

Why Your Camera Changes Picture Colors
With a mind-boggling number of posts about weird colors in your photos, I’ll provide a simple definition and photo tips to help ease your frustrations.
If you’ve experienced your camera changing colors and making your photos look weird, I know how frustrating that is. The good news is that the solution is often as close as a simple camera adjustment.
In every photo you take, your subject is illuminated by some kind of light, either natural or artificial. During certain times of the year, such as Christmas, this often creates the challenge of photographing Christmas tree lights, and why your camera changes the picture colors.
Light has a temperature, and the temperature of the particular light source can affect how your camera captures the scene, whether perfectly or with weird colors. Depending on how your camera reacts to this light temperature in different environments, you can end up with unflattering results.

A Christmas tree scene with unnatural orange color hues.
What's Going on When Your Camera Changes Picture Colors?
If you’re unfamiliar with the setting, your camera has a feature called White Balance.
The camera makes adjustments, usually in the default Auto White Balance mode, according to its interpretation of the environment’s light temperature to create results you’re most often happy with.
Sometimes, however, the camera cannot decipher the temperature accurately, and that's why your camera changes picture colors.
The good news is that adjusting the White Balance setting in your camera will most often solve the problem.
To find the white balance setting:
You may have a quick access feature on your camera body, such as the button at the top left side and the letters WB.
Another option is to press the Menu button on your camera body, then highlight the camera icon to bring up the Shooting Menu.
Within this menu, look for the White Balance option, as shown in the example below.
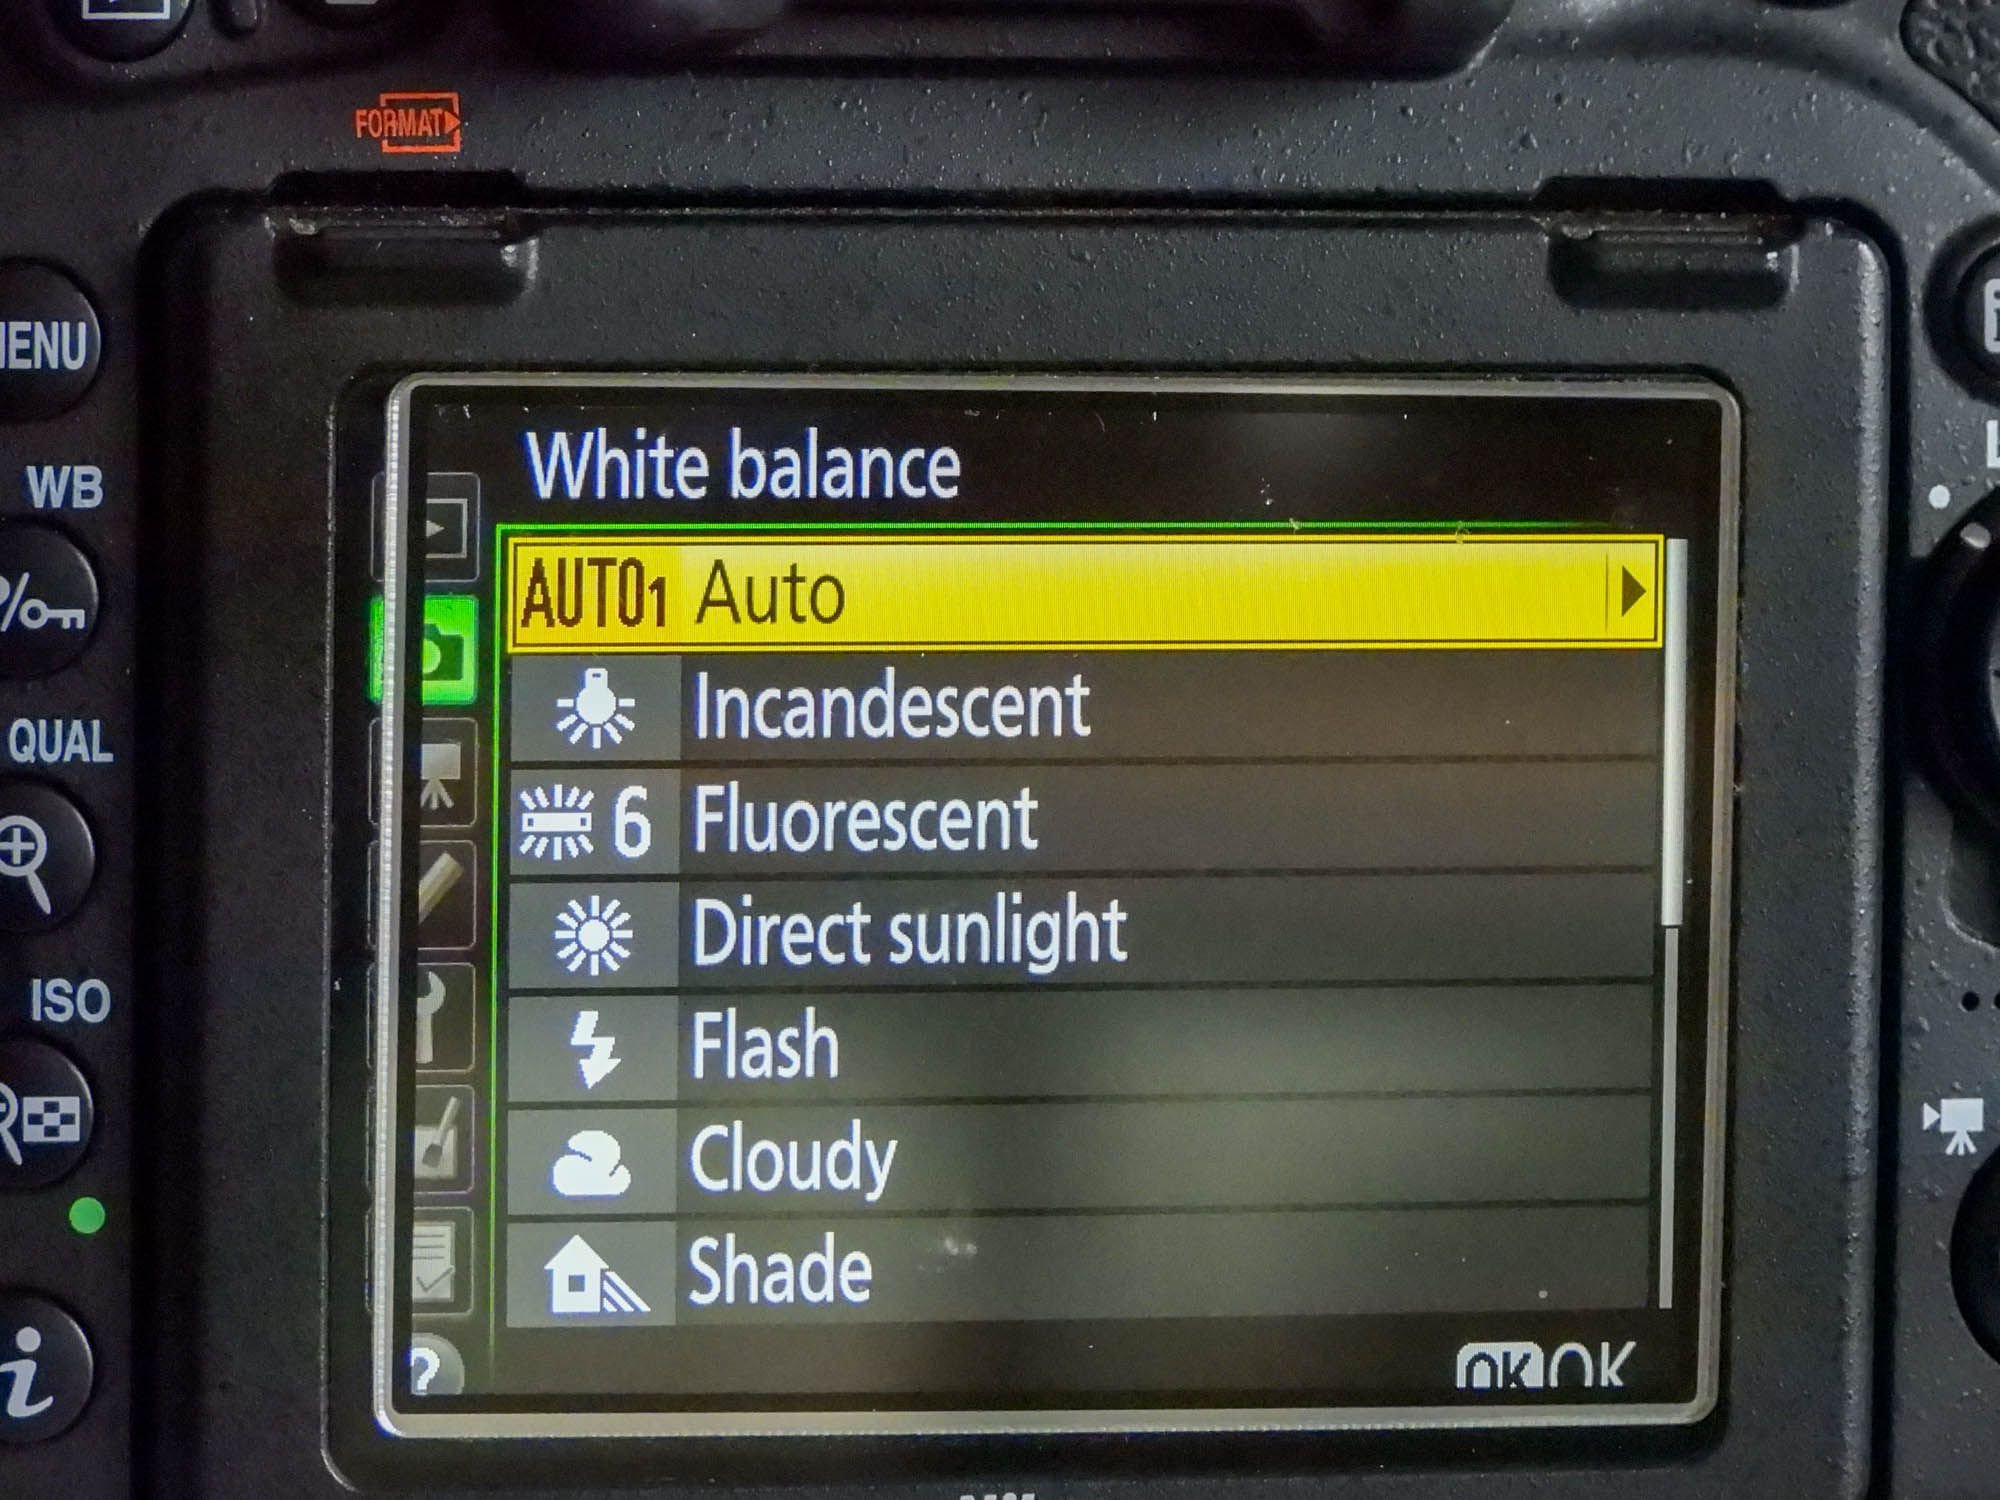
An example of white balance options within the camera menu.
You can expect to find different options within the white balance setting. Your camera may show you what the adjustment will produce as you go; if not, it may take some time to experiment until you find the best one. After choosing different options for improved results, you may still be unsatisfied, like I was with the results below.

White Balance Setting - Fluorescent. Not quite.

White Balance Setting - Auto 2 warm colors. Nope.

White Balance Setting - Incandescent. No improvement.

White Balance Setting - Manual 10000K. Yikes.
What Else Can You Do if You're Not Satisfied?
Who is Kelvin?
I'd like to introduce you to Kelvin. Kelvin is a manual, or custom, white balance setting that allows you to adjust the temperature setting. However, this may not be possible in all camera shooting modes. For example, it's unavailable in my camera’s automatic shooting mode. However, I can adjust it in the semi-auto modes of aperture priority, shutter speed priority, and full manual camera mode.
By continuing to scroll through the white balance options, I anticipate that you'll arrive at a color temperature choice like the one below.
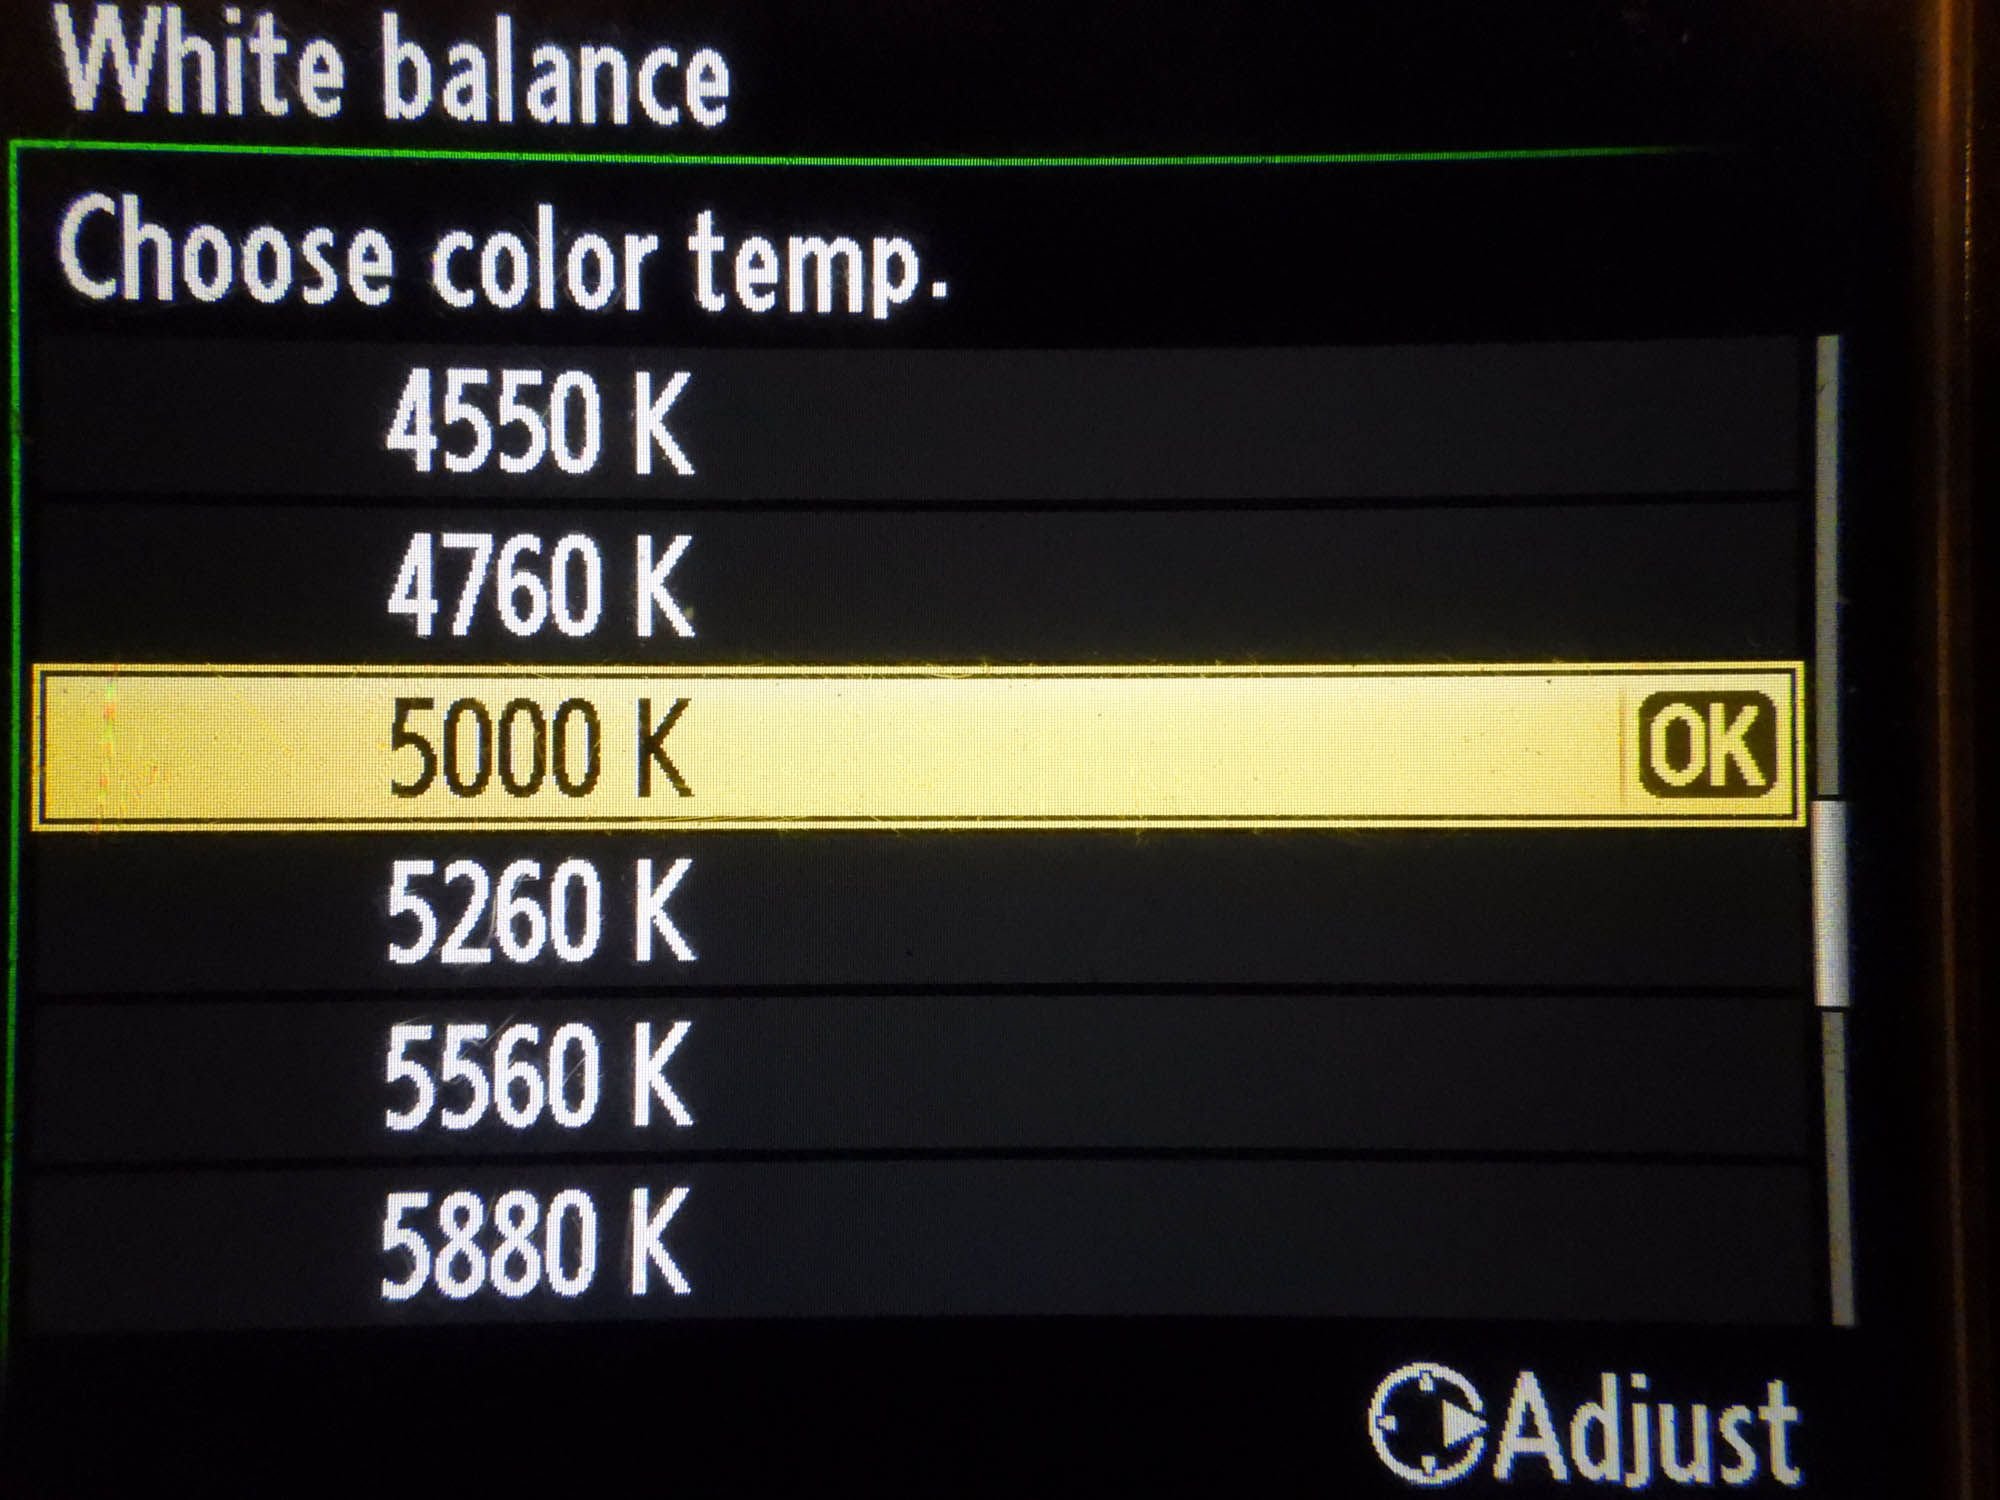
A color temperature of 5000 K, for Kelvin, is highlighted.
Depending on your camera model, you can tweak the settings beyond choosing a color temperature. After highlighting 5000K and pressing the right arrow on the round toggle wheel on the back of my camera, I have additional fine-tuning options, as shown in the example below. By fine-tuning, if necessary, you can expect to render a more pleasing and satisfactory result for why your camera changes picture colors and what you can do about it.

An example of a custom color temperature menu for adjusting white balance beyond the standard options.
How I Rendered a Satisfactory Exposure
In Conclusion
After taking pictures using different white balance options (as seen above) and being unsatisfied, I utilized the manual Kelvin options. In the last example from the four images above, note the deep orange and a manual color temperature choice of 10000K, which was a profound flop.
The 2500 K manual temperature choice you see here worked to my satisfaction and depicted the colors far more realistically. White Balance photo tip: Remember to change your WB setting back to your usual setting, which I suspect is the Auto White Balance (AWB). Otherwise, you'll experience the same type of issues you now know how to solve.

White Balance Setting - Manual 2500K. Realistic results.
The 2500 K manual temperature choice you see here worked to my satisfaction and depicted the colors far more realistically.
In Conclusion
Now that you know why your camera changes picture colors, you can take action to render results that are vastly improved and more pleasing.
White Balance Photo Tip - change it back to the usual.
After changing the white balance to deal with occasional challenges, remember to change it back to your usual WB setting, which I suspect is Auto White Balance (AWB).
If you forget, the next time you take photos in different light, you may find yourself in the same situation where you need to adjust the WB for picture colors.